The escalating global trend towards compact urban living, characterized by smaller apartments and minimalist housing designs, has brought kitchen functionality and aesthetics into sharp focus. For interior designers and homeowners alike, the challenge of creating a spacious, efficient, and visually appealing cooking area within limited dimensions is paramount. InteriorDesign.ID frequently advises that strategic selection of small kitchen ceramics—prioritizing light palettes, appropriate sizing, and minimal patterns—can dramatically expand the perceived space, making the area feel more expansive and inviting. This approach extends beyond mere aesthetics, encompassing crucial considerations such as texture, installation patterns, and grout color, all of which are instrumental in transforming a confined kitchen into a highly functional and durable culinary hub.
Designing a diminutive culinary space demands meticulous attention to detail, particularly concerning the choice of floor and wall materials. These selections directly influence the room’s perceived size and overall ambiance. Rather than merely following fleeting trends, designers must critically assess factors such as light reflectivity, stain resistance, and ease of maintenance. This comprehensive guide provides both technical specifications and visual strategies to empower homeowners and professionals in making informed decisions for their small kitchen ceramic selections.
Why Small Kitchens Demand a Distinct Design Approach
Small kitchens present a unique set of challenges that necessitate a specialized design methodology. Due to their confined nature, these areas are inherently more susceptible to the accumulation of grease splatters, food spills, and heat from cooking appliances. An inappropriate choice of wall and floor coverings can not only exacerbate the feeling of claustrophobia but also significantly complicate routine cleaning and long-term maintenance.
Beyond mere visual appeal, a superior kitchen design must prioritize practical, everyday usability. This principle is particularly critical in smaller spaces where every element must contribute to efficiency and ease of use. The chosen ceramics must possess sufficient durability to withstand daily kitchen activities, from heavy foot traffic to accidental impacts. Ultimately, a clean and visually appealing kitchen environment is not merely a matter of good design but is fundamentally supported by the inherent quality and resilience of its selected materials. Industry analysis continually points to the fact that poorly chosen materials in high-traffic, high-moisture areas like kitchens lead to increased maintenance costs and diminished property value over time.
Technical Standards: The Foundation of Durable Kitchen Ceramics
Before delving into aesthetic inspirations, it is imperative to understand the technical specifications that underpin the longevity and ease of maintenance of kitchen ceramics. These standards ensure that the materials chosen are not only beautiful but also capable of enduring the rigors of a busy kitchen environment.
Water Absorption Rate
The kitchen is an inherently wet environment, constantly exposed to splashes from sinks and accidental spills. The water absorption rate of a tile is a critical indicator of its suitability. High-quality porcelain tiles, for instance, typically boast a water absorption rate of less than 0.5%, rendering them virtually impermeable. This low porosity is crucial as it prevents liquids, such as cooking oils, sauces, or even plain water, from seeping into the tile body and causing permanent stains, mold growth, or bacterial accumulation. Unlike more porous ceramic tiles, porcelain’s dense composition ensures that spills remain on the surface, allowing for easy wipe-down without leaving lasting marks from substances like soy sauce or turmeric. This property significantly contributes to the hygienic integrity of the kitchen space.

PEI Rating (Porcelain Enamel Institute)
The PEI rating, ranging from 1 to 5, quantifies a tile’s resistance to abrasion and wear. For residential kitchen floors, selecting tiles with a PEI rating of 3 or 4 is highly recommended. A PEI 3 tile is suitable for light to moderate foot traffic, while a PEI 4 tile can withstand moderate to heavy traffic. This ensures the tile surface can resist scratches and scuffs from moving chairs, dropped utensils, or regular footwear, maintaining its aesthetic appeal over time. For wall applications, such as backsplashes, the PEI rating becomes less critical, as these surfaces do not endure foot traffic or heavy abrasion.
Anti-Slip Rating (R-Rating)
Safety is paramount in any kitchen, especially given the frequent presence of water and oil on floors. The R-Rating (Ramp Test Value) measures a tile’s coefficient of friction, indicating its anti-slip properties. For kitchen floors, a rating of R9 or R10 is generally advisable. Tiles within this range provide adequate grip to prevent slips and falls, even when the surface is wet, without being excessively rough or difficult to clean. Conversely, using highly polished or very smooth wall tiles on the floor is a significant safety hazard and should be avoided. The selection of an appropriate R-Rating directly contributes to minimizing the risk of domestic accidents, a growing concern in modern households.
Visual Strategies for Maximizing Floor Space in Small Kitchens
The flooring choice is a pivotal element in determining the perceived spaciousness of a kitchen. In compact areas, the primary objective is to minimize visual interruptions, particularly grout lines. Fewer visible grout lines create a more seamless and expansive floor surface, lending an immediate sense of openness.
Tile Size and Proportion
A common misconception dictates that small rooms require small tiles. Counterintuitively, medium to large format tiles, such as 60×60 cm, are often more effective in eliminating the sense of confinement. Larger tiles drastically reduce the number of grout lines, making the floor appear as a single, continuous plane. This approach also minimizes the need for awkward, small cuts along the wall edges, leading to a cleaner and more professional finish. For instance, if a kitchen’s main walkway measures 1.2 meters in width, two 60×60 cm tiles laid side-by-side perfectly fill the space, requiring no cuts and creating an uninterrupted visual flow. This strategy not only enhances aesthetics but also simplifies installation and reduces material waste.
Color Palette for Flooring
Light colors are inherently reflective, bouncing natural and artificial light around the room, which is crucial for making a small space feel brighter and more open. Opt for palettes such as off-white, light cream, or pale grey. These hues effectively reflect overhead lighting, illuminating the often-shadowed areas beneath cabinetry and countertops. If a marble aesthetic is desired, choose patterns with very subtle, fine veining. Overly bold or thick marble patterns can create a busy, cluttered appearance on the floor, counteracting the desired effect of spaciousness. The goal is understated elegance that contributes to an airy feel.
Surface Finish Considerations
A matte (doff) finish is highly recommended for kitchen floors. Its non-reflective surface is more forgiving, effectively concealing minor scratches, dust, and dried water spots, which are inevitable in a busy kitchen. Matte tiles are also generally easier to sweep and mop as they do not highlight every imperfection. In contrast, highly polished (high-gloss) floors, while initially appealing, tend to reflect harsh glares from overhead lights and immediately expose even the smallest smudges or water marks, demanding constant, rigorous cleaning to maintain their pristine appearance. The practical benefits of a matte finish far outweigh the initial visual impact of a glossier alternative for most residential kitchens.
Elevating Aesthetics: Backsplash Design for Minimalist Kitchens
The backsplash, typically the wall area between upper and lower cabinets (often around 60 cm in height), frequently serves as a kitchen’s visual focal point. This area offers an excellent opportunity to introduce texture and character without overwhelming the entire space. Beyond its primary function of protecting walls from cooking splatters, the backsplash is a key design element that can define the kitchen’s personality.

Timeless Subway Tile Designs
Subway tiles, characterized by their rectangular, brick-like shape (common sizes include 7.5×15 cm or 10×20 cm), are a perennial favorite for minimalist kitchens due to their simple elegance and timeless appeal. For smaller spaces, installing subway tiles in a horizontal brick pattern can visually extend the width of the wall, making the kitchen feel broader. Their clean lines and versatile nature ensure they remain a staple in contemporary design, adapting effortlessly to various aesthetic preferences.
Vertical Patterns for Low Ceilings
When faced with a low ceiling, a clever optical illusion can be created by installing subway tiles vertically. The upward-stretching lines draw the eye vertically, giving the impression of increased height between the countertop and the ceiling. This simple shift in installation pattern can significantly alter the perceived dimensions of the space, making it feel less constrained.
Geometric Hexagon Motifs
Small hexagonal (six-sided) tiles offer a sophisticated alternative to traditional square or rectangular patterns. The honeycomb arrangement provides a clean, geometric texture that can add visual interest without appearing busy, especially when paired with sleek, handle-less cabinetry. White glossy hexagon tiles, particularly when illuminated by under-cabinet LED strip lighting, create captivating light reflections that add depth and a touch of modern flair to the kitchen.
Reflective Materials: Glass and Mirror Backsplashes
For extremely compact kitchens, such as those found in studio apartments, tempered glass or mirrored backsplashes are an innovative solution. The reflective surface creates an illusion of depth and amplifies the perception of space by mirroring the room. While highly effective in creating an open feel and a sleek, contemporary look, these materials do require consistent cleaning with glass cleaner to prevent oil vapors and smudges from dulling their reflective quality. However, their easy-to-wipe surface often makes maintenance simpler than porous alternatives.
The Critical Role of Grout Selection
The color and type of grout used play a surprisingly significant role in the overall aesthetic and longevity of ceramic installations. Grout acts as a frame for each tile, and an incorrect choice can either enhance or detract from the intended design, particularly in a small kitchen.
Contrast vs. Harmony in Grout Color
When designing a backsplash, if the aim is to highlight the distinctive shape of subway or hexagon tiles, a contrasting grout color (e.g., white tiles with dark grey grout) can be very effective in accentuating the pattern. However, this contrasting approach should generally be avoided for kitchen floors. For flooring in a small kitchen, selecting a grout color that closely matches the tiles creates a uniform, seamless surface. This minimizes visual breaks, contributing to the expansive feel desired in confined spaces. The goal is to make the floor appear as a single, unbroken plane of material.
Epoxy Grout: A Superior Choice for Kitchens
Traditional cementitious grout is inherently porous, making it susceptible to absorbing grease, food spills, and moisture, which often leads to stubborn stains and the growth of mold and mildew, particularly in high-moisture areas like kitchens. For this reason, epoxy-based grout is highly recommended for kitchen applications. Epoxy resin is non-porous, chemically resistant, waterproof, and inherently anti-fungal. While the initial cost of epoxy grout is higher than cementitious alternatives, its superior resistance to staining, cracking, and mold growth translates into significantly reduced maintenance effort and long-term durability. This investment frees homeowners from the arduous task of scrubbing discolored and mildewed grout lines, ensuring a consistently hygienic and attractive kitchen environment.

Achieving Cohesion: Cabinetry and Ceramic Harmony
A harmonious balance between ceramic tiles, kitchen cabinets, and countertops is essential for creating a cohesive and inviting kitchen. In small spaces, restraint is key, limiting the overall color palette to a maximum of three primary hues to prevent a cluttered or haphazard appearance. If the wall ceramics feature a textured or patterned design, it is advisable to opt for simpler, unadorned cabinet designs to maintain visual equilibrium.
The Pristine All-White Concept
An all-white kitchen remains the safest and most effective option for maximizing perceived space in a small footprint. To prevent the design from appearing sterile or monotonous, introduce subtle variations in texture. For example, pairing matte white cabinets with a glossy or subtly corrugated white ceramic backsplash can create visual interest through the interplay of light and shadow on different surfaces. This textural contrast adds depth and sophistication without introducing additional colors or patterns that could overwhelm the space.
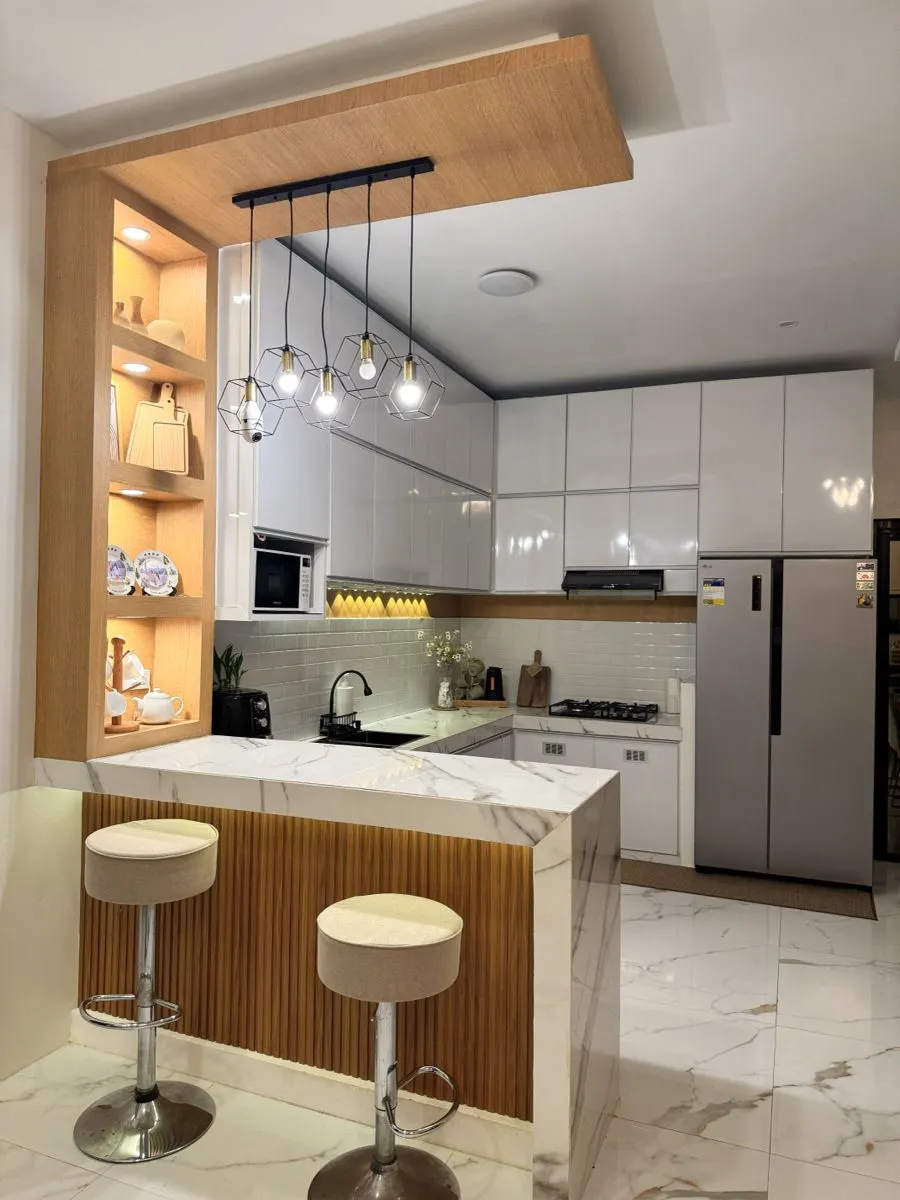
Natural Wood and Neutral Ceramic Combination
Incorporating natural wood elements can infuse a sense of warmth and relaxation into a kitchen. In a small area, choose wood with a soft, understated grain, such as light oak or pine. These light wood tones pair beautifully with neutral ceramics, like off-white backsplashes, creating a natural yet modern aesthetic. This combination is a hallmark of the popular Japandi style, which marries Scandinavian functionality with Japanese minimalism, resulting in calm, organic, and highly functional spaces.
Strategic Two-Tone Accents
While light colors are generally preferred for small kitchens, darker hues can be effectively integrated through a two-tone design strategy. Apply rich, deep colors, such as navy blue or charcoal grey, to the lower cabinets only. This creates a solid, grounding base. For the upper cabinets and backsplash, maintain a light and bright palette. This approach ensures the upper portion of the room remains visually expansive and airy, preventing the darker colors from making the space feel heavy or enclosed. This strategic use of color can add sophistication and visual anchor points without sacrificing the illusion of space.
Strategic Lighting for Small Kitchens
Even the most meticulously chosen materials can appear dull or uninspired if the lighting strategy is inadequate. Effective lighting is crucial for both functionality and ambiance in a small kitchen.
Under-Cabinet Lighting
Installing LED strip lighting directly beneath upper cabinets serves a dual purpose. Firstly, it provides essential task lighting, directly illuminating the backsplash and work surfaces, which is critical for food preparation. This focused illumination sharply highlights the ceramic textures and patterns of the backsplash. Secondly, it contributes significantly to the overall brightness of the kitchen, eliminating shadows and making the space feel more open and inviting. Modern LED strips are energy-efficient and unobtrusive, seamlessly blending into the design.
Optimal Color Temperature for Illumination
The color temperature of light, measured in Kelvins (K), profoundly affects a room’s atmosphere and how colors are perceived. Avoid cool, bluish-white lights (typically 6500K), which can make a kitchen feel sterile and cast an unflattering pallor on food. Instead, opt for natural white lighting (around 4000K) for general kitchen illumination. This temperature provides a balanced, crisp light that accurately renders the true colors of food ingredients and ceramic surfaces. For dining areas or a kitchen island with a bar, incorporating warmer yellow lighting (3000K) from pendant fixtures can create a cozy, intimate ambiance, fostering a more relaxed dining experience.

Common Pitfalls in Small Kitchen Design
Several technical and design errors are frequently made in small kitchen renovations, often leading to regret once the installation is complete. Awareness of these pitfalls can save time, money, and frustration.
Over-Reliance on Busy Motifs
While patterned tiles, such as vintage encaustic designs, possess undeniable charm, their widespread application in a small 2×2 meter kitchen can result in visual overload and a dizzying effect. Instead, limit the use of highly patterned or busy tiles to a single accent area, such as the backsplash behind the hob. For the remaining wall and floor surfaces, opt for plain, complementary ceramics to maintain visual calm and spaciousness. This strategy allows for a touch of personality without overwhelming the confined area.
Inadequate Wall Preparation
For rectangular tiles, especially longer subway styles, the flatness of the underlying wall is paramount. An uneven wall can cause tile edges to protrude, creating unsightly ridges and potential hazards for accidental scrapes during cleaning. Before tile installation, it is crucial to ensure that the wall plastering is perfectly flat and smooth. Professional installers often use leveling compounds to achieve the ideal surface for tile adhesion.
Neglecting Dry-Lay Planning
Proceeding directly to tile installation without first performing a "dry-lay" (arranging the tiles on the floor without adhesive) is a common mistake. This omission can result in awkward, asymmetrical cuts, particularly around edges and corners. A dry-lay allows for precise planning of tile placement, ensuring that any necessary cuts are made symmetrically and that smaller, less appealing tile pieces can be strategically placed in less visible areas, such as under appliances or in corners. This planning step is critical for a professional and aesthetically pleasing finish.
Maintenance and Longevity: Preserving Your Kitchen Ceramics
Proper daily maintenance is essential not only for keeping a kitchen clean but also for preserving the integrity and appearance of ceramic materials over time. Incorrect cleaning practices can slowly degrade grout and tile surfaces.
Avoid Harsh Acidic Cleaners
Many commercial limescale removers and heavy-duty cleaners contain strong acidic compounds. While effective against tough stains, these chemicals can severely damage the protective glaze of ceramic tiles and erode cementitious grout, turning it brittle and sandy. For routine cleaning, a simple mixture of warm water and mild dish soap is usually sufficient. Cleaning spills immediately after cooking prevents stains from setting and eliminates the need for aggressive cleaning agents.
Utilize Microfiber Cloths for Superior Cleaning
Traditional cotton rags often merely push grease and grime around, rather than effectively lifting them. Microfiber cloths, with their finely woven fibers, are designed to trap and hold dirt particles, making them far more effective for cleaning kitchen surfaces. For stubborn spots, spray a pH-neutral cleaner directly onto the soiled area, allow it to penetrate briefly, then gently wipe with a clean microfiber cloth. This method ensures thorough cleaning without scratching surfaces.

Protect Floors from Impact Damage
Accidental drops of heavy objects, such as cast-iron pots, pans, or stone mortars, can cause chips or cracks in porcelain floor tiles. To mitigate this risk and enhance safety, place thick, anti-slip kitchen mats in high-traffic and high-spill zones, particularly near the sink and cooking range. These mats provide a cushioned barrier against impacts and also help contain splashes and spills, preventing them from spreading across the entire floor and creating slip hazards.
Managing Your Material Budget and Ensuring Professional Installation
For small kitchens, the relatively smaller area requiring ceramic tiles means that the overall material cost might be less prohibitive. This presents an opportunity to invest in higher-quality, more durable materials that offer long-term benefits.
Strategic Material Procurement
To optimize costs and ensure consistency, purchase all necessary ceramic tiles, adhesive, and grout from the same supplier and at the same time. This approach not only saves on delivery charges but also guarantees that all materials come from the same batch, minimizing variations in color or texture. It is also prudent to purchase an additional 10-15% of material to account for cutting errors, potential breakages during transport or installation, and future repairs. This contingency prevents delays and avoids the difficulty of matching batches later.
Prioritizing Professional Installation
Even the most expensive and aesthetically pleasing ceramics can appear shoddy if installed improperly. Investing in professional tile setters, particularly those specializing in ceramic and porcelain, is crucial. Experienced tilers possess the precise cutting tools and laser leveling equipment necessary to ensure perfectly straight grout lines, uniform spacing, and a level finish—qualities that are especially noticeable and critical in a small space. Professional installation guarantees not only the aesthetic integrity of the design but also the long-term durability and performance of the tiled surfaces. The initial investment in skilled labor pays dividends in the form of a flawless, long-lasting kitchen.
Conclusion
The meticulous selection of materials for a minimalist kitchen is a nuanced endeavor, demanding a careful balance between refined visual aesthetics and robust, resilient technical specifications. By adhering to a palette of light colors, opting for proportionally appropriate floor tile sizes, and integrating simple, elegant ceramic forms on wall surfaces, homeowners can create an immediate sense of spaciousness. The strategic application of non-porous epoxy grout to seal every seam further enhances hygiene and simplifies maintenance, ensuring stain resistance and preventing mold growth. This deliberate fusion of thoughtful design principles with high-performance materials guarantees that a small kitchen remains a perpetually inviting, highly functional, and aesthetically pleasing core of the home, always ready to facilitate the daily rhythm of culinary activity.