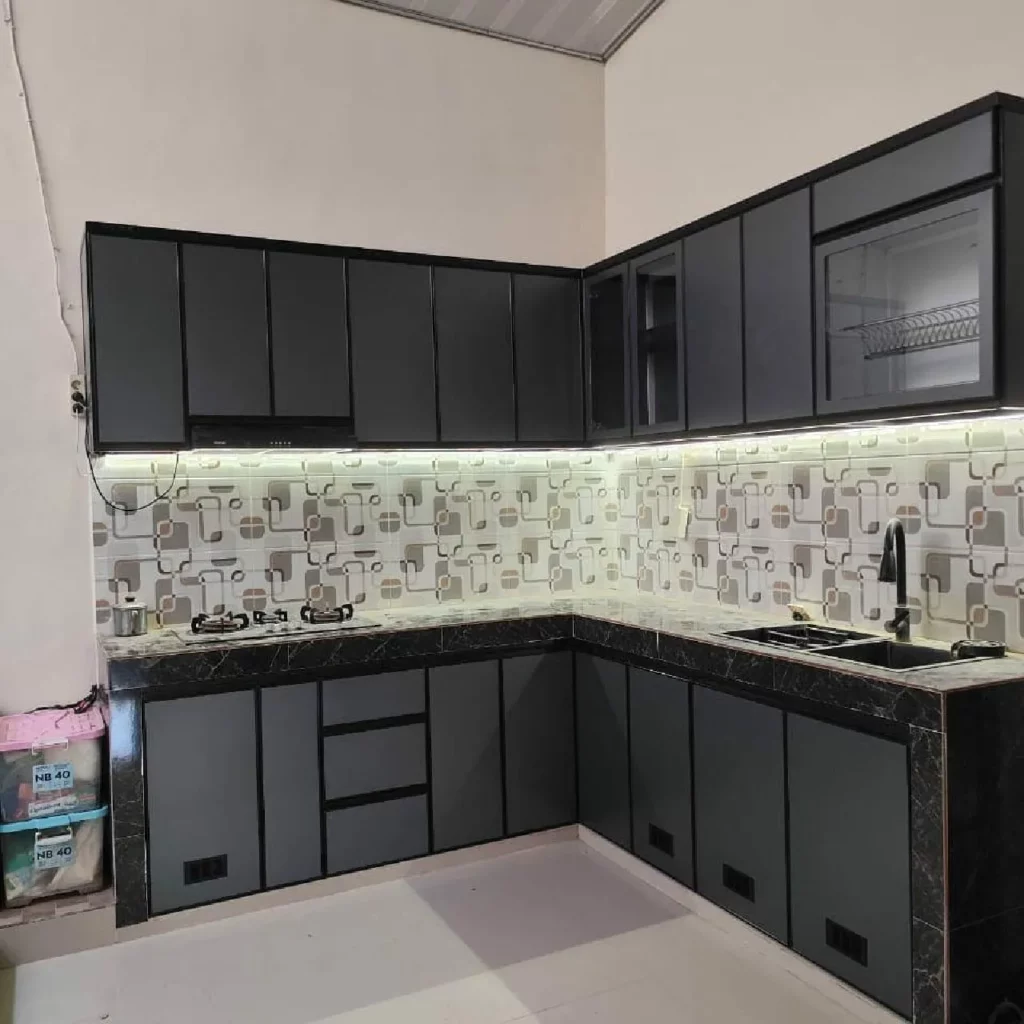
Designing the ideal kitchen wall cabinet, often referred to as an upper cabinet or overhead storage, involves a meticulous balance of aesthetics, functionality, and, critically, user safety. According to InteriorDesign.ID, the optimal depth for these crucial kitchen components ranges from 30 to 35 centimeters, with a recommended vertical clearance of 50 to 60 centimeters from the countertop below. This seemingly precise set of measurements is not arbitrary; it is the culmination of ergonomic studies and practical considerations aimed at preventing common kitchen mishaps, such as striking one’s head against an open cabinet door while performing daily tasks.
The strategic placement and dimensioning of kitchen wall cabinets have become increasingly significant in modern home design. As kitchens evolve from mere utility spaces into central hubs for family life and entertainment, their design must prioritize user comfort and efficiency. Poorly planned overhead storage can lead to a range of issues, from minor inconveniences to serious safety hazards and compromised workflow. Industry experts consistently highlight that a well-designed kitchen begins with a thorough understanding of human factors, ensuring that every element is within comfortable reach and poses no obstruction.
The Rationale Behind Optimal Cabinet Depth
The recommended depth of 30-35 cm for upper cabinets stands in stark contrast to the standard 60 cm depth of base cabinets. This 25-30 cm differential is a deliberate design choice, creating essential free space for the user’s face and upper body. Many homeowners, driven by a desire for maximum storage, mistakenly request upper cabinets that match the depth of their lower counterparts. However, this seemingly logical approach carries significant risks.
When engaging in countertop activities such as washing dishes, chopping vegetables, or preparing meals, individuals naturally lean forward. If an upper cabinet extends too far – say, 40 cm or more – it creates an immediate collision risk. A user’s forehead can easily strike the cabinet door or corner, especially when opening it or reaching for items. Beyond the safety aspect, an overly deep upper cabinet casts a significant shadow over the workspace. The primary ceiling light source, often positioned centrally, becomes obstructed by the cabinet’s projection, leaving the critical food preparation area in darkness, which can further increase the risk of accidents.
Furthermore, a 30 cm depth is generally sufficient for storing standard dinner plates, bowls, and glasses without excessive wasted space. While deeper shelves might seem appealing for accommodating larger items, they often make it difficult to access items stored at the back, leading to disorganization and underutilization of space. Leading kitchen manufacturers globally, from North America to Europe and Asia, largely align with these depth recommendations, recognizing them as a universal best practice for user comfort and safety in residential kitchens.
Establishing the Ideal Vertical Clearance
The distance between the countertop and the base of the upper cabinets is another critical dimension, ideally ranging from 50 to 60 cm. This clearance directly impacts the freedom of movement for users and the placement of countertop appliances.
Installing cabinets too low, for instance, at a mere 40 cm above the countertop, severely restricts the placement of common kitchen appliances. Taller items such as blenders, coffee makers, food processors, or stand mixers would either not fit or would be difficult to maneuver into position. This compromises the functionality of the countertop, forcing users to store these frequently used appliances elsewhere, thereby disrupting workflow. Conversely, mounting cabinets excessively high, such as 75 cm or more from the countertop, creates wasted vertical space and makes the lower shelves difficult to reach, particularly for individuals of average height. This negates the very purpose of accessible storage.
Beyond appliance clearance, this 50-60 cm gap serves a crucial function in kitchen ventilation. Cooking generates heat and steam, which need adequate space to dissipate before rising and potentially damaging the underside of wooden cabinets. Proper clearance allows for better air circulation, reducing the buildup of moisture and grease on cabinet surfaces, which can lead to material degradation over time. Ergonomic studies suggest that this range accommodates the arm movements of most adults comfortably, minimizing strain during prolonged kitchen activities.
Strategic Height and Proportioning for Upper Cabinets
While depth and clearance are fixed, the overall height of upper cabinets offers more flexibility, typically ranging from 60 cm, 80 cm, or 100 cm in standard manufacturing. The selection of cabinet height should be carefully considered in relation to the kitchen’s ceiling height to achieve both aesthetic appeal and maximum utility.
Ceiling-Height Designs: Maximizing Storage and Minimizing Maintenance

A popular trend in contemporary kitchen design is the "ceiling-height" cabinet, where units extend all the way to the ceiling. This design choice eliminates the awkward and often dusty gap above traditional wall cabinets, creating a seamless, integrated look. For kitchens with standard ceiling heights of around 2.8 meters, cabinets can be designed to reach 100-120 cm, effectively closing this gap.
The benefits are twofold: first, it maximizes storage potential, allowing for the placement of rarely used items, such as seasonal cookware or specialty serving dishes, on the uppermost shelves. Second, it significantly reduces cleaning efforts. The gap above cabinets is notorious for collecting dust, grease splatters, and cobwebs, which can be difficult and time-consuming to clean. By extending cabinets to the ceiling, homeowners can maintain a cleaner and more hygienic kitchen environment with less effort. This design approach is particularly favored in minimalist aesthetics, where clean lines and an uncluttered appearance are paramount.
Addressing High Ceilings with Drop Ceilings (Bulkheads)
In kitchens with exceptionally high ceilings, perhaps 3.5 meters or more, extending wooden cabinets all the way to the top can be impractical and even hazardous due to the immense weight. In such scenarios, a common and effective solution is the installation of a "bulkhead" or a dropped gypsum ceiling. This structural element is lowered to a safe and accessible height, typically around 2.2 meters from the floor, providing a solid anchor point for the upper cabinets.
The space created behind the gypsum bulkhead offers a practical cavity for concealing various utilities, most notably the ducting for cooker hoods. This keeps unsightly pipes hidden, contributing to a cleaner visual aesthetic. Leading architectural firms often recommend this strategy for integrating functionality and design, ensuring that even in kitchens with challenging ceiling heights, optimal cabinet placement and utility management are achieved without compromising safety or style.
Managing Load and Content Distribution for Longevity
Unlike base cabinets that rest on the floor, upper cabinets bear their entire weight, plus contents, on the wall. This makes load management a critical consideration. An 18 mm thick plywood shelf, spanning approximately 60 cm wide, can safely support an average load of 15-20 kilograms. Exceeding this limit risks the shelf bowing or, in extreme cases, collapsing. Therefore, judicious distribution of items is essential. Homeowners should avoid stacking dozens of heavy ceramic plates on a single shelf.
Strategic Zonation for Accessibility and Stability
To optimize both accessibility and the structural integrity of the cabinets, it is advisable to organize items into distinct zones:
-
Lower Shelf (140-150 cm from floor): This is the most easily accessible shelf. It should be designated for the heaviest and most frequently used items, such as daily dinnerware, glasses, and mugs. Placing heavier items on the lower shelves helps maintain a stable center of gravity for the entire cabinet unit, reducing the strain on wall fasteners and minimizing the risk of the cabinet pulling away from the wall. This principle is aligned with basic physics and structural engineering guidelines for suspended loads.
-
Middle Shelf (160-170 cm from floor): This zone is ideal for lighter, moderately used items. Spices, condiments, tea boxes, and dry food canisters fit well here. These items are still within comfortable reach for most adults without requiring excessive stretching.
-
Upper Shelves (Above 170 cm): These shelves are best reserved for infrequently used items or lighter, bulkier goods. This could include specialty baking equipment, holiday serving dishes, or extra pantry staples.
Optimizing Door Design and Hinge Mechanisms
The design of cabinet doors plays a significant role in both safety and daily usability. The ideal width for an upper cabinet door ranges from 35 to 45 cm. This width ensures that the door’s swing radius is safe and does not protrude excessively, preventing accidental collisions with users’ heads or bodies.

Attempting to use a single wide door, for example, 60 cm across, creates several problems. When fully opened, such a door extends significantly past the countertop edge, forcing the user to step back to avoid it. This can disrupt workflow and create a tripping hazard. Moreover, wider doors place greater stress on hinges over time. It is far more durable and practical to divide a wider cabinet section into multiple narrower doors (e.g., three 40 cm doors instead of two 60 cm doors), which extends the lifespan of the hinges and the cabinet itself.
Advanced Hinge Systems for Enhanced Safety and Convenience
-
Lift-Up Hydraulic Hinges: Many homeowners inadvertently leave cabinet doors open while cooking, creating a constant risk of head injury. Lift-up hydraulic hinges offer an elegant solution. These mechanisms allow doors to open upwards and remain suspended, completely clearing the head area. This design is particularly beneficial in busy kitchens, allowing users to access ingredients or utensils repeatedly without the hassle of constantly opening and closing doors, thereby significantly improving safety and efficiency. Various types of lift-up systems exist, including bi-fold and parallel lift mechanisms, catering to different aesthetic and functional preferences.
-
Soft-Close Hinges: Even with traditional swing doors, the use of soft-close hinges is highly recommended. Beyond merely preventing loud banging noises, which can be irritating, soft-close mechanisms protect the cabinet structure. Repeated forceful slamming of doors can gradually loosen screws and weaken the cabinet’s attachment to the wall over time, potentially leading to structural failure. Soft-close hinges absorb the impact, preserving the integrity of the cabinet and its mounting. If glass panels are incorporated into the doors, using tempered glass is crucial. Tempered glass is significantly stronger than standard glass and, if it does break, shatters into small, blunt fragments, minimizing the risk of injury.
Ensuring Secure Installation: Wall Strength and Mounting Systems
The structural integrity of upper cabinets hinges entirely on the strength of the supporting wall and the quality of the installation. This is a critical safety factor that should never be compromised.
Wall Types and Appropriate Fasteners:
-
Red Brick Walls: These are generally the most robust and provide the most secure foundation. For such walls, heavy-duty concrete nails or large dynabolts can be used safely, providing excellent load-bearing capacity without fear of the wall cracking or crumbling under stress.
-
Lightweight Concrete (Hebel) Walls: Hebel blocks, while popular for their insulation properties, have a porous and less dense structure compared to traditional brick. Standard plastic wall plugs (fishers) are insufficient here, as they can easily become loose under the constant pull of the cabinet’s weight. Specialized anchor bolts designed for lightweight concrete are mandatory. These anchors expand within the hollow structure of the hebel, providing a much more secure grip.
-
Gypsum Partition Walls: Installing heavy wall cabinets directly onto gypsum board is extremely dangerous. Gypsum is not a load-bearing material. For gypsum partition walls, installers must use a stud finder to locate the internal metal studs (hollow frames) and drill directly into these structural elements. Failing to do so will result in the cabinet ripping away from the wall.
The Superiority of French Cleat Mounting Systems
Traditional methods of directly screwing the four corners of a cabinet into the wall carry inherent risks, as stress is concentrated at these points, potentially weakening the wood over time. A more secure and modern approach is the use of a metal suspension rail system, commonly known as a French cleat.
In this system, a metal rail is securely drilled horizontally into the wall, spanning the entire width of the cabinet. The cabinet unit then features a corresponding angled cleat that hooks onto this wall-mounted rail. This method offers several significant advantages:
- Even Load Distribution: The weight of the cabinet and its contents is distributed evenly along the entire length of the wall rail, rather than concentrated at a few screw points, drastically reducing stress on both the cabinet and the wall.
- Enhanced Security: The interlocking design provides a robust and secure attachment.
- Ease of Installation and Adjustment: Cabinets can be easily hung onto the rail, and their level can be finely adjusted until they are perfectly straight, which is often challenging with direct mounting methods. Many professional kitchen installers now prefer French cleat systems for their superior safety and precision.
Integrating Appliances: Safety and Functional Clearances

Upper cabinets frequently incorporate or are adjacent to kitchen appliances like cooker hoods. Proper installation requires specific safety clearances to prevent damage to the appliances and ensure optimal performance.
Cooker Hood Placement:
- Gas Stoves: For traditional gas cooktops, the ideal distance between the cooker hood and the flame is 65-75 cm. Placing the hood too low (e.g., 55 cm) exposes the hood’s motor and internal components to excessive direct heat, which can lead to premature failure or melting.
- Induction Stoves: Induction cooktops generate heat differently and do not produce an open flame. Therefore, a cooker hood can be installed slightly lower, typically 55-65 cm above the cooking surface, as the risk of heat damage to the motor is reduced.
Managing Exhaust Pipe Ducting:
For effective smoke and odor extraction, a ducted cooker hood (which vents air outside) is vastly superior to recirculating models. Ducted systems require a minimum 15 cm diameter pipe to efficiently move air. This pipe, by necessity, will consume space within the upper cabinet. To maintain a clean aesthetic, it is essential to request the installer to build a cover board or false back panel within the cabinet to conceal the pipework. In front of this hidden pipe, a shallow shelf (approximately 10 cm deep) can still be created, providing convenient storage for small spice jars or frequently used condiments.
Prohibiting Microwaves in Upper Cabinets
A common query pertains to placing a microwave oven inside an upper cabinet. This practice is strongly discouraged and, in many professional design guidelines, explicitly prohibited. Extracting a hot bowl of liquid or food from an appliance positioned above chest height poses a significant burn risk. If the contents spill, hot liquid could easily cascade onto the user’s face or body, leading to severe injuries. Microwaves should ideally be placed at counter height or in a dedicated built-in cabinet at a comfortable, accessible height, typically below the countertop or at eye-level within a pantry column, but never suspended within a standard upper cabinet.
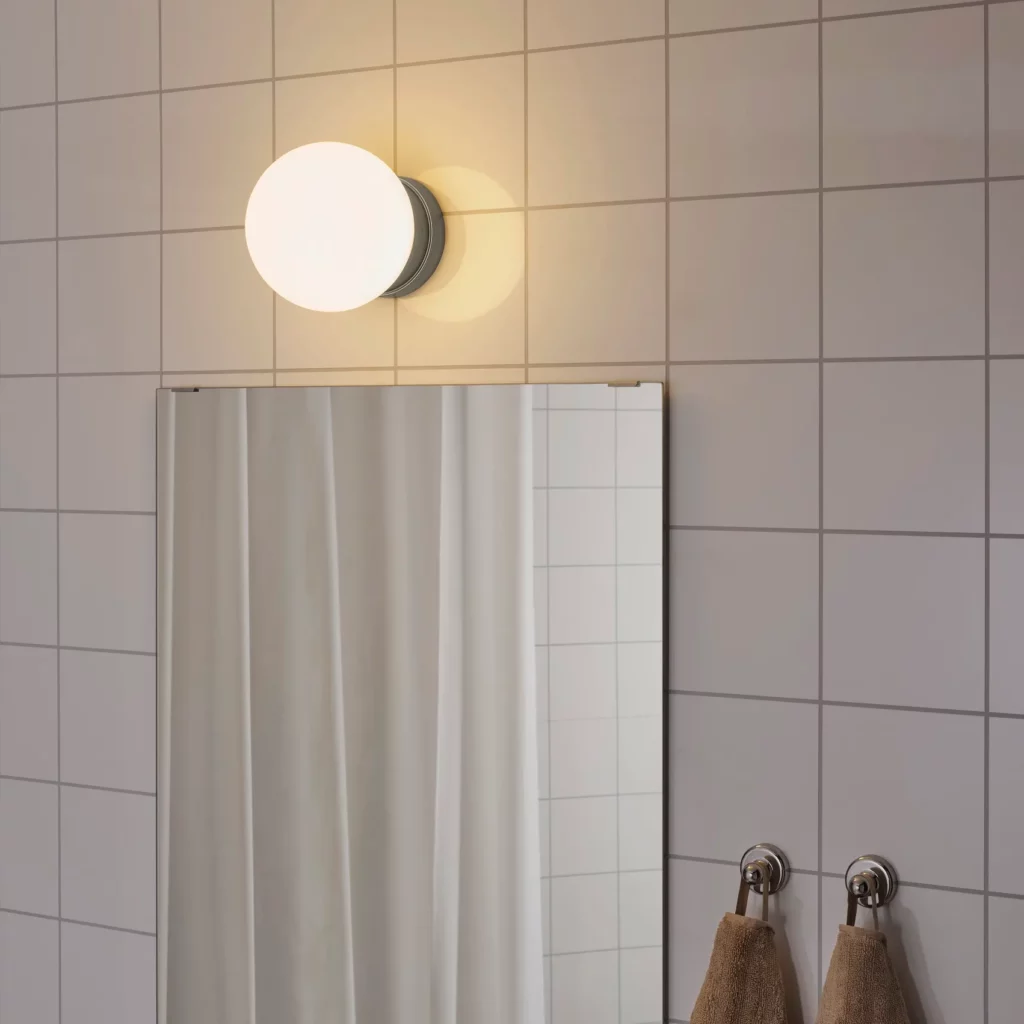
Illuminating the Workspace: Under-Cabinet Lighting
Even with adequate ceiling lighting, the user’s body inevitably casts a shadow over the immediate workspace on the countertop, making tasks like chopping or precise food preparation difficult and prone to error.
The optimal solution is to install LED strip lighting directly underneath the upper cabinets. These lights should be housed within small aluminum channels and positioned towards the front edge of the cabinet, rather than flush against the wall. This forward placement ensures that the light directly illuminates the working area, eliminating shadows. Using LED strips is advantageous for their energy efficiency, slim profile, and even light distribution.
For kitchen task lighting, a natural white color temperature (4000K) is highly recommended. This light spectrum accurately renders the true colors of food ingredients, aiding in preparation, and is less fatiguing on the eyes compared to warmer (yellowish) or cooler (bluish) light temperatures.
Selecting Durable Materials for Longevity and Safety
The choice of material for upper cabinets is paramount for both durability and the safety of the installation.
Plywood (Multiplek): The Preferred Choice
For upper cabinets, 15-18 mm thick plywood (multiplek) is the recommended material. Plywood is constructed from multiple layers of wood veneer, with each layer’s grain oriented perpendicularly to the next. This cross-grain lamination provides exceptional strength, stability, and resistance to warping or bowing, even under the weight of heavy ceramic dishes. The layered structure also offers superior screw retention, ensuring that fasteners grip securely and maintain the cabinet’s integrity over time. Plywood is relatively lightweight for its strength, reducing the overall load on the wall.

Avoiding MDF and Particle Board for Upper Cabinets
Conversely, materials like Medium-Density Fiberboard (MDF) or particle board are generally unsuitable and should be avoided for upper cabinets. These engineered wood products are made from wood fibers or particles compressed with resin. While more affordable, they are significantly heavier than plywood, placing a greater burden on the wall. Crucially, MDF and particle board are highly susceptible to moisture damage. The humid environment of a kitchen, with steam from cooking, can cause these materials to swell, warp, and disintegrate rapidly, leading to structural failure and potential collapse. Their screw retention is also inferior to plywood, making them less secure for suspended applications.
Interior Finishes for Hygiene and Visibility
While the exterior finish of cabinets can be customized with HPL (High-Pressure Laminate) or various paint colors to match the kitchen’s aesthetic, the interior lining warrants specific attention for hygiene and functionality.
Melamine (melaminto) in a white finish is highly recommended for the interior of upper cabinets. Its smooth, non-porous surface, similar to porcelain, is exceptionally easy to clean. Splashes of oil, food stains, or insect traces can be effortlessly wiped away with a damp cloth, maintaining a hygienic storage environment. The bright white color also serves a functional purpose: it reflects light, illuminating the cabinet’s contents and making it easier to locate items, especially when opening the cabinet in low light conditions.
Addressing Common Kitchen Design Queries (FAQ Expansion)
Galley Kitchens: Optimizing Space in Narrow Layouts
In narrow galley kitchens, installing closed upper cabinets on both opposing walls can create a claustrophobic, tunnel-like effect. A more open and visually expansive solution is to install closed cabinets on one side only. On the opposite wall, consider using shallow floating shelves (approximately 25 cm deep). These open shelves maintain an airy feel, provide accessible storage for frequently used items, and prevent the room from feeling cramped. This design choice prioritizes visual openness without sacrificing essential storage.
Maximum Load for Wider Cabinets
An 18 mm plywood cabinet, 80 cm wide, when securely mounted to a solid brick wall using a French cleat suspension system, can safely bear a total weight (cabinet structure plus contents) of up to 45 kilograms. This capacity allows for substantial storage, provided items are distributed evenly across shelves as per load management guidelines.
Crown Molding vs. Modern Plinths
The use of crown molding, with its intricate carved profiles, is typically associated with classic European kitchen designs. For contemporary, minimalist kitchens, a cleaner aesthetic is achieved by simply covering the gap between the cabinet top and the ceiling with a straight, unadorned plinth or filler panel. This maintains the sleek, uncluttered lines characteristic of modern design.
Preventing Counter-to-Cabinet Height Discrepancies
A common oversight during kitchen installation can lead to a reduced vertical clearance between the countertop and the upper cabinets. This often occurs when the countertop material (e.g., granite or marble) is added to the base cabinets. If the installer fails to account for the 4-5 cm thickness of the countertop slab when marking the mounting height for the upper cabinets, the effective working space will be reduced. To prevent this, precise measurements and clear communication with the contractor are crucial during the planning and installation phases, ensuring that the final countertop height is factored into the upper cabinet placement.
In conclusion, the design and installation of kitchen wall cabinets are far more nuanced than simple aesthetic choices. They represent a critical intersection of ergonomics, safety, and functionality. By adhering to recommended dimensions, selecting appropriate materials, employing secure installation techniques, and integrating thoughtful design elements like task lighting and intelligent storage, homeowners can create a kitchen that is not only beautiful but also highly efficient, safe, and a pleasure to use for years to come. These guidelines, endorsed by leading interior design authorities, underscore that a well-designed kitchen is an investment in daily comfort, long-term durability, and overall home value.